 how-to
Handling Peptide Contamination in Lab Settings
Table of Contents
- What You'll Need Before You Start
- Step 1: Set Up Your Laminar Flow Hood or Biosafety Cabinet
- Step 2: Don Proper PPE and Follow Glove Protocols
- Step 3: Sterilize Vial Septa and Practice Aseptic Handling
- Step 4: Meet Peptide Vial Kit Size Requirements for Your Study
- Step 5: Follow Best Practices for Peptide Storage
- Step 6: Preventing Cross-Contamination in Proteomics Workflows
- Step 7: Contain and Neutralize Spills
- Frequently Asked Questions
Last Updated: September 12, 2026
What You'll Need Before You Start
Handling peptide contamination starts long before you open a vial. Peptide contamination rarely announces itself, it shows up later as a shifted retention time, a failed assay, or a discarded batch.
This guide from Online Peptide Sales covers the practical steps research teams use to keep peptide work clean, from hood setup to spill response. You will need:
- A certified laminar flow hood or biosafety cabinet
- Nitrile gloves, lab coat, and eye protection
- Isopropyl alcohol (70%) and lint-free wipes
- Sterile syringes, needles, and filters
- Bacteriostatic or sterile water, plus DMSO and buffer solutions as your protocol requires
- A calibrated thermometer and sealed storage containers
The steps below map to a standard operating procedure you can adapt to your lab. Order matters: setup, PPE, handling, storage.
Step 1: Set Up Your Laminar Flow Hood or Biosafety Cabinet
A laminar flow hood protects your sample; a biosafety cabinet protects both you and your sample. Which one you need determines how you work, clean, and wait before opening a vial.
Choosing Between a Laminar Flow Hood and a Biosafety Cabinet
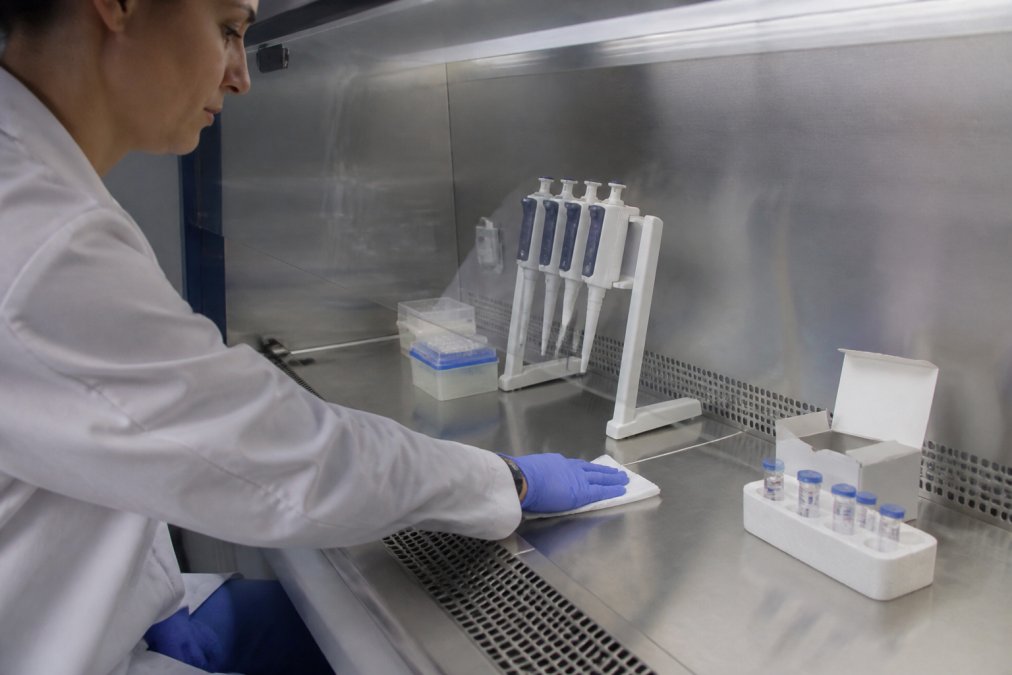
Horizontal laminar flow hoods push HEPA-filtered air across the work surface toward the operator, protecting the sample but not the person, suitable for non-hazardous, non-volatile work like weighing lyophilized powder or preparing buffers. Vertical hoods push air down and are gentler on open vials because the air curtain is less likely to lift powder.
Biosafety cabinets (BSCs) recirculate or exhaust air through HEPA filters, protecting both operator and sample. Class II Type A2 is the most common choice for labs handling solvents, since it exhausts a portion of air and manages low-level chemical vapors. Class II Type B2 is hard-ducted outside and suits routine work with volatile solvents such as acetonitrile or trifluoroacetic acid. For aqueous buffers and lyophilized powder only, a horizontal laminar flow hood is often sufficient and cheaper to operate.
Cleaning and Preparing the Workspace
Wipe the work surface, back wall, and side panels with 70% isopropyl alcohol before every session, and let it flash off completely, a wet surface carries contaminants and can degrade certain peptide films. Keep only what you need for the current step, laid out left-to-right to match your workflow so you never reach across an open vial.
For BSCs, also wipe the front grille and the underside of the sash, which collect dust and glove residue that re-enters the air stream. Avoid chlorine-based disinfectants on stainless steel unless the manufacturer approves them; residual chloride pits the surface and harbors spores.
Airflow and Particulate Control
Turn the hood on and let it run at least 15 minutes before work. Labs running BSCs continuously need only a few minutes of stabilization after raising the sash, but horizontal laminar flow hoods typically need the full 15 minutes for the filter media and plenum to reach steady-state velocity.
Keep movements slow and deliberate; rapid motions disrupt the air curtain and pull airborne microbes into your work zone. Place items at least 10 cm inside the front edge, and in a horizontal hood work at least 10 cm back from the filter face so air becomes laminar before reaching your sample.
Verifying Hood Performance
An uncertified hood is not a clean work zone. Most institutions require annual certification of laminar flow hoods and BSCs, plus re-certification after a move. Certification checks HEPA filter integrity, downflow and inflow velocity, and airflow smoke patterns. Without a current sticker, treat the hood as a variable, not a control.
Between certifications, run a smoke pencil or tissue test to confirm the air curtain is intact. If tissue flutters toward you in a horizontal hood, the filter may be loaded or the blower failing, log it and request service before the next session.
Step 2: Don Proper PPE and Follow Glove Protocols
PPE is your first barrier against cross-contamination: wear a lab coat, safety glasses, and nitrile gloves for every peptide handling task.
Change gloves between different peptides, after touching any non-sterile surface, and after a spill. A glove that touched a vial septum should never touch a pipette tip or a second vial, this habit prevents most cross-contamination in proteomics workflows.
Face the airflow when you work, and never reach over an open vial. According to CDC guidance on laboratory biosafety, proper glove use and hand hygiene remain the foundation of safe handling in any lab setting.
Step 3: Sterilize Vial Septa and Practice Aseptic Handling
Aseptic handling means keeping sterile items sterile by controlling every point of contact. The septum is the most common failure point.
Septum Disinfection with Isopropyl Alcohol
Swab the septum with 70% isopropyl alcohol and let it dry. Do not push the needle through a wet septum; alcohol can carry contaminants into the vial. Use a fresh needle for each vial to avoid transferring material between samples.
Reconstitution and Dilution Best Practices
Reconstitute lyophilized powder slowly. Add solvent down the inside wall of the vial rather than directly onto the powder. Swirl gently; do not vortex, because shear forces can cause denaturation. Use buffer solutions matched to your peptide's isoelectric point where possible. For a full breakdown of preparation steps, see NIH peptide handling resources.
Step 4: Meet Peptide Vial Kit Size Requirements for Your Study
Matching peptide vial kit size requirements to your study phase prevents waste and shortage, a pilot may need a few vials, a multi-arm trial dozens.
Plan kit size around three factors: study arms, time points, and expected loss from repeat testing. Larger kits lower per-vial cost only if you can store the surplus correctly. Online Peptide Sales supplies research compounds in 10-vial kits with Janoshik-verified batch reports, helping procurement confirm batch identity before a study begins.
| Study Phase | Typical Vial Need | Storage Priority |
|---|---|---|
| Pilot / feasibility | 2-4 vials | Short-term, -20°C |
| Dose-ranging | 6-12 vials | Medium-term, -20°C |
| Multi-arm trial | 20+ vials | Long-term, -80°C |
Step 5: Follow Best Practices for Peptide Storage
Best practices for peptide storage come down to temperature, moisture, and light. Get all three right and most peptides hold integrity for months; get one wrong and you can lose a batch to hydrolysis, oxidation, or aggregation before opening the vial.
Temperature Control and Lyophilized Powder Stability
Store lyophilized powder at -20°C for routine work and -80°C for long-term archival. The choice depends on how long the material must last and how often you open the vial: -20°C suits material used within a few months, while -80°C slows residual moisture migration and suits reference standards, calibration peptides, and batches kept over a year.
Keep vials sealed and let them reach room temperature before opening, opening a cold vial in a warm room pulls moisture onto the powder, the most common cause of peptide degradation in storage. Warm up 20 to 30 minutes on the bench with the cap on, and never use a heat source to speed it up.
Protect from light with amber vials or foil wrapping. Tryptophan, methionine, and cysteine are especially sensitive to oxidation, which light accelerates, if your peptide contains any of these, treat light protection as mandatory.
Moisture, Desiccant, and Freeze-Thaw Discipline
Lyophilized powder is hygroscopic, and ambient moisture enters every time you open a vial. Use a desiccant such as indicating silica gel in the storage container and replace it when the indicator changes color. Keep vials in a sealed secondary container rather than loose in a freezer drawer, so a freezer failure or frost event does not expose them directly.
For reconstituted peptide, aliquot before freezing. A 1 mL vial thawed and refrozen five times has effectively been through five freeze-thaw cycles, each promoting aggregation. Split the solution into single-use aliquots sized to your typical experiment, freeze at -20°C or -80°C depending on the peptide, and thaw only what you need. Avoid storing reconstituted peptide at 4°C for more than a few days unless your protocol calls for it.
Long-Term Stability Testing After Contamination
This is the step most labs skip. A vial exposed to a contamination event, even briefly, should be quarantined and retested rather than trusted. The goal is not to prove it clean but to document whether the material still meets your acceptance criteria, a decision made on data, not hope.
A practical post-contamination protocol:
- Quarantine the vial immediately. Label it with the date of exposure, the suspected contaminant, and the storage conditions since exposure.
- Inspect visually. Look for cloudiness, particulates, color shift, or a change in the powder's appearance. Any of those is a fail.
- Reconstitute a small aliquot under your normal aseptic conditions and run LC-MS or HPLC against a clean reference standard of the same peptide.
- Compare retention time, peak shape, and purity against the reference. A shift in retention time greater than your method's normal variability is a red flag.
- If the material passes, release it with a documented note that it was previously quarantined. If it fails, dispose of it as chemical waste and do not use it for quantitative work.
Stability data from a contaminated vial is not comparable to baseline data, so label it clearly and keep the exposure log with the batch record. If one event touched multiple vials, test a representative sample from each storage group rather than assuming the whole lot is affected or unaffected.
Storage Logs and Inventory Discipline
A storage system is only as good as its records. Log each vial's storage date, freezer and shelf location, and first-open date, first-open marks the start of moisture exposure. A simple spreadsheet or LIMS entry suffices; anyone on the team should be able to find a vial and know its history without asking around.
Step 6: Preventing Cross-Contamination in Proteomics Workflows
Preventing cross-contamination in proteomics demands discipline at every transfer point. One contaminated tip can invalidate an entire plate.
Automated Liquid Handling Contamination Risks
Automated platforms are efficient but hide contamination: a shared wash station or poorly primed line can carry residue between wells. Run a blank between samples, verify wash cycles, and audit tubing and tips regularly. Treat the robot's deck like a manual bench, clean, covered, monitored.
Solvent-Peptide Interaction Risks
Solvent compatibility deserves more attention than it usually gets. DMSO can oxidize certain residues, and residual trifluoroacetic acid from synthesis can alter solubility. Test each peptide in your intended solvent at small scale before committing a full batch. A quick solubility check saves a wasted run.
Step 7: Contain and Neutralize Spills
Stop, contain, and decontaminate, in that order. A peptide spill is a contamination event, not just cleanup.
Isolate the area and put on fresh gloves. Absorb the liquid with a lint-free pad, working from the outside of the spill inward. Wipe the surface with 70% isopropyl alcohol, then with sterile water, then dry. Dispose of all materials as chemical waste per your lab's safety protocols. Log the spill, the peptide involved, and the cleanup steps. If the spill touched any open vial, quarantine that vial for stability testing. For spill-response standards, consult OSHA laboratory safety guidance.
Frequently Asked Questions
How do I avoid contamination in laboratory samples?
Work inside a certified laminar flow hood or biosafety cabinet, wear fresh nitrile gloves, and disinfect every vial septum with 70% isopropyl alcohol before piercing. Use sterile technique for all pipetting and never let the pipette tip touch a non-sterile surface. Keep buffers and solvents dedicated to peptide work. These steps reduce airborne microbes and particulate matter that cause peptide contamination in lab settings.
What are the signs of peptide contamination in a research setting?
Visible cloudiness, unusual precipitate, or color change in a reconstituted solution often signals microbial contamination. Unexplained peaks on chromatography or LC-MS analysis, drifting retention times, or a drop in expected signal intensity can point to degradation or cross-contamination. If a lyophilized powder fails to dissolve cleanly after reconstitution, or if blank runs show carryover, treat the vial as compromised and quarantine it.
How does cross-contamination affect peptide research results?
Cross-contamination introduces foreign peptides, protease activity, or denaturation that skews quantitative results. In proteomics, even trace carryover from an automated liquid handler can inflate peptide counts in blank samples and mask real differences between study groups. Poor solvent compatibility, such as residual DMSO in a buffer, can also alter peptide solubility and produce false readings on LC-MS analysis.
What PPE is required when handling sensitive research peptides?
At minimum, wear nitrile gloves, a lab coat, and safety glasses. For work with lyophilized powder, add a fitted N95 or P100 respirator to avoid inhaling airborne particles. Change gloves whenever you move between peptide vials, especially after touching a phone, door handle, or notebook. When handling DMSO or other solvents, use solvent-resistant gloves and work inside a biosafety cabinet to protect sample integrity and the operator.
Peptide contamination costs time, samples, and credibility. Building a repeatable SOP around your hood, your PPE, and your storage keeps contamination out and your data trustworthy. Online Peptide Sales supports that work with 10-vial research kits, Janoshik-verified batch reports, and tamper-evident export packaging, so you can confirm what you are working with before it reaches your bench. Get started with Online Peptide Sales and view the batch lab reports for your next order.