 how-to
Peptide Kit Storage and Handling: 2026 Lab Guide
Table of Contents
- What You'll Need Before You Start
- Peptide Storage Temperature Guidelines for Freezer, Fridge, and Bench
- Step-by-Step Peptide Kit Storage and Handling Routine
- Peptide Vial Kit Size Requirements: 3mL, 5mL, and 10mL Vials
- Reconstituted Peptide Shelf Life and Aliquoting
- Travel-Safe Peptide Kit Storage and TSA Compliance
- Common Storage and Handling Mistakes to Avoid
- Frequently Asked Questions
Last Updated: September 17, 2026
What You'll Need Before You Start
Peptide kit storage and handling succeeds or fails on preparation. Before a vial leaves its shipping box, set up the infrastructure that keeps compounds stable.
Gather these items first:
- A calibrated refrigerator and freezer. A household fridge swings in temperature every time the door opens; a lab-grade unit with a digital readout and alarm holds steady.
- A benchtop thermometer or data logger. Place it on the same shelf as your vials.
- A hard shell protective case with foam inserts. This is your primary defense against light, moisture, and physical shock.
- Nitrile gloves and a clean work surface. Skin oils and particulates contaminate reconstituted solutions.
- Labeling supplies. Date of receipt, date of reconstitution, batch number, and concentration. Every vial, every time.
- Aliquoting supplies. Sterile microcentrifuge tubes and a calibrated pipette for splitting doses before freezing.
Peptide Storage Temperature Guidelines for Freezer, Fridge, and Bench
Peptide storage temperature guidelines break down into three zones, and the right zone depends on whether your peptide is lyophilized or reconstituted: powder tolerates colder, longer storage; reconstituted solution demands colder, shorter storage.
| Peptide State | Storage Zone | Target Temperature | Typical Duration |
|---|---|---|---|
| Lyophilized powder | Freezer | -20°C or below | Months to years |
| Lyophilized powder | Refrigerator | 2°C to 8°C | Weeks to months |
| Reconstituted solution | Refrigerator | 2°C to 8°C | Days to weeks |
| Reconstituted solution | Bench | Room temperature | Hours only |
Freezer Storage for Lyophilized Peptides
Lyophilized peptides, the freeze-dried powder form most research kits ship in, are the most forgiving to store. A freezer held at -20°C or colder keeps them stable for extended periods, provided the powder stays dry.
Refrigeration and Short-Term Bench Limits
Once reconstituted, a peptide's clock ticks fast. Refrigeration at 2°C to 8°C slows degradation but does not stop it; bench storage is measured in hours, not days.
Step-by-Step Peptide Kit Storage and Handling Routine
A repeatable routine beats good intentions. This sequence takes about ten minutes per kit and prevents the handling errors that ruin research compounds.
- Inspect on arrival. Check tamper-evident seals and confirm batch numbers against your Janoshik-verified report before anything goes cold.
- Log every vial. Record batch number, receipt date, and quantity in a storage rack inventory sheet or lab notebook.
- Equilibrate cold shipments. Let vials reach room temperature sealed before opening to prevent condensation.
- Sort by state. Keep lyophilized powder and reconstituted solution in separate, clearly labeled zones.
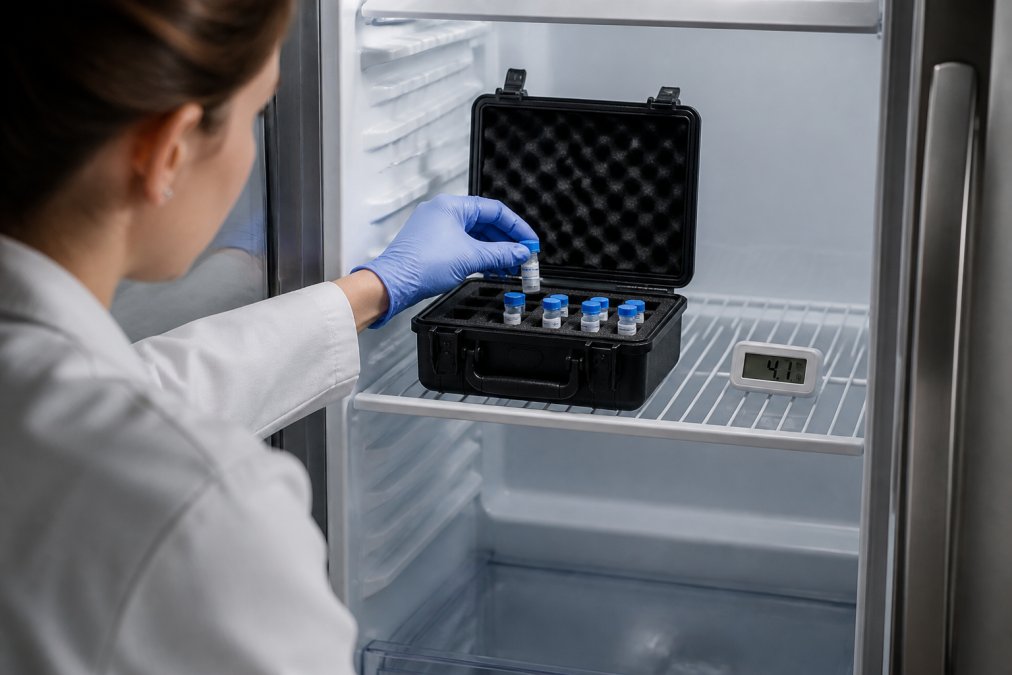
- Place in the protective case. Seat each vial upright in foam so it cannot shift, rattle, or tip.
- Store in the correct zone. Freezer for powder, refrigerator for reconstituted, bench only during active use.
- Recheck temperature daily. A data logger makes this a glance, not a chore.
Peptide Vial Kit Size Requirements: 3mL, 5mL, and 10mL Vials
Peptide vial kit size requirements depend on three variables: reconstitution volume, dosing frequency, and how long a single vial must last. Matching size to protocol prevents waste and repeated freeze-thaw cycles, and vial geometry controls headspace, which controls how much oxygen and moisture your compound contacts.
| Vial Size | Typical Use Case | Best For | Headspace Trade-off |
|---|---|---|---|
| 3mL | Small pilot studies, single-subject protocols | Low-volume, short-duration work | Minimal headspace; fast to use, but limited doses per vial |
| 5mL | Standard reconstitution, moderate dosing | Most routine research protocols | Balanced; the default for most single-protocol work |
| 10mL | High-volume or multi-dose studies | Long protocols, bulk reconstitution | Large headspace; more oxygen contact per dose drawn |
Why Headspace Matters More Than Capacity
A vial is not a neutral container. The headspace above the powder or solution carries oxygen and trace moisture that drive oxidation and hydrolysis, two primary degradation pathways for peptide sequences. A 10mL vial holding 3mL of solution has roughly 7mL of headspace, exchanged for room air with every dose drawn; a 3mL vial holding the same 3mL has almost none.
Matching Size to Protocol
- 3mL vials suit pilot work, single-subject protocols, and studies where a vial is fully consumed within days of reconstitution. The small headspace and short exposure window are advantages.
- 5mL vials are the workhorse for routine research. They hold enough reconstituted volume for a typical multi-dose protocol while keeping headspace moderate.
- 10mL vials make sense only when you are reconstituting in bulk and aliquoting immediately into single-use tubes. If a 10mL vial will sit reconstituted in a refrigerator for weeks, the size is working against you.
Compartmentalization and Slot Configuration
Compartmentalization matters as much as raw capacity. A modular layout with dedicated slots per size keeps 3mL, 5mL, and 10mL vials from mixing, and foam inserts cut to each vial diameter prevent the rattling that agitates solution.
Reconstituted Peptide Shelf Life and Aliquoting
Reconstituted peptide shelf life is short and shrinks with every temperature fluctuation. In refrigeration, most reconstituted peptides hold for days to a few weeks depending on sequence and buffer. The fix is aliquoting: split a freshly reconstituted vial into single-use portions immediately, then freeze what you will not use within days.
How to Reconstitute Without Damaging the Peptide
Reconstitution is simple but unforgiving of shortcuts.
- Equilibrate both the vial and the diluent to room temperature before mixing.
- Add the diluent down the vial wall, not directly onto the powder. A direct stream causes foaming and physical shear.
- Swirl gently. Never vortex or shake. Agitation denatures peptide structure and reduces bioavailability.
- Let it dissolve fully. If powder remains, swirl again. Do not add heat.
- Aliquot immediately into single-use sterile tubes and freeze what you will not use within days.
- Label each aliquot with concentration, date, and batch number.
Travel-Safe Peptide Kit Storage and TSA Compliance
Travel is where peptide kit storage and handling protocols fail most often, because you lose control of temperature, orientation, and documentation all at once. The Transportation Security Administration permits medically necessary liquids in carry-on baggage, but the exemption is procedural, not automatic, and research compounds do not always fit the medical framing cleanly. Confirm current requirements directly with the TSA guidance on medically necessary items before every trip, since screening procedures change.
What the Screening Rules Actually Require
TSA's 3-1-1 rule caps carry-on liquids at 3.4 ounces (100 mL) per container in a single quart-sized clear bag. Medically necessary liquids are exempt from the volume cap, but you must declare them to the screening officer before the bag goes through the X-ray:
- Declare before screening. Tell the officer you have medically necessary liquids or refrigerated items. Do not wait for the bag to be pulled.
- Expect additional screening. Exempt items may be opened, swabbed for trace explosives, or X-rayed separately. Pack so a vial can be inspected without exposing the rest of the kit to room temperature.
- Ice packs, gel packs, and freezer packs are allowed in carry-on and checked baggage when they are being used to keep medically necessary items cold. They are subject to the same screening as the items they cool.
- Checked baggage is a worse option for temperature control. Cargo holds run cold and unpressurized, and bags sit on tarmacs. If you must check a kit, insulate heavily and accept that you cannot monitor it.
Packing for Thermal and Physical Stability
A hard shell case with closed-cell foam is the baseline. Beyond that, the packing decisions that matter are:
- Use a phase-change gel pack, not an ice pack. Ice swings between 0°C and room temperature as it melts; a phase-change pack formulated for 2°C to 8°C holds a stable range for hours longer. For lyophilized powder, a pack rated near -20°C is appropriate for longer trips.
- Separate powder from reconstituted solution. Reconstituted vials are the fragile ones and should sit closest to the cold source. Lyophilized powder tolerates brief ambient exposure far better.
- Immobilize every vial. Foam inserts that hold vials upright prevent the low-level agitation that degrades peptide structure over hours of handling. A vial rolling in a soft bag is a vial being shaken.
- Keep the case closed. Every inspection or bag check that opens the case resets the internal temperature. Pack so a single opening reveals everything an officer needs.
- Carry documentation outside the case. Batch records, a Janoshik-verified report, and a plain-language statement of the material's purpose belong in a folder you can hand over without unpacking the kit.
Documentation That Survives a Checkpoint
Research compounds sit in a gray zone that medical prescriptions do not. Carry the batch number, the supplier's verification report, and a short written description of the material and why it is being transported. A tamper-evident, foam-lined case presents cleanly and reduces the chance of a prolonged inspection that exposes your kit to ambient temperature.
Common Storage and Handling Mistakes to Avoid
The failures that ruin peptide research are rarely dramatic, small, repeated, and invisible until results contradict expectations.
- Repeated freeze-thaw cycles. Every cycle stresses the peptide. Aliquot to avoid them.
- Opening cold vials immediately. Condensation introduces moisture onto lyophilized powder.
- Storing reconstituted peptide on the bench. Room temperature accelerates degradation within hours.
- Ignoring light exposure. Clear vials on an open shelf degrade faster than amber vials in a closed case.
- Overcrowding the storage rack. Vials that touch and rattle during handling experience constant low-level agitation.
- Skipping documentation. Without batch records and storage logs, you cannot trace a failed result to its cause.
Frequently Asked Questions
How long can peptides be left unrefrigerated?
Lyophilized peptides tolerate short periods at room temperature, but keep exposure under a few hours. Once reconstituted, peptide kit storage rules tighten: refrigerate at 2-8°C and use within days to weeks depending on the compound. For shipping or bench work, use a cooler with gel packs. Heat, humidity, and light accelerate degradation, so never leave vials on a sunny bench or in a hot vehicle.
Should peptides be stored in the refrigerator or freezer?
Lyophilized peptides belong in a freezer at -20°C or colder for long-term storage. Move them to the refrigerator at 2-8°C only when you plan to use them soon. After reconstitution, refrigeration is standard, with short-term use in mind. Follow your peptide storage temperature guidelines and the certificate of analysis for the specific compound, since some sequences are more sensitive to freeze-thaw cycles than others.
How do I store peptides after reconstituting?
Reconstituted peptide shelf life is shorter than lyophilized. Refrigerate at 2-8°C, protect from light, and avoid repeated temperature swings. If you won't use the full vial quickly, aliquot into smaller sterile vials before freezing so you thaw only what you need. Label each vial with the date, concentration, and batch number. Never refreeze a thawed aliquot, because repeated freeze-thaw cycles degrade peptide integrity.
What are good storage ideas for peptide supplies?
Use a vial organizer or storage rack inside a hard shell case with honeycomb insulation for thermal stability. Keep desiccant packs in the case to limit moisture, and store away from light. A modular layout lets you separate 3mL, 5mL, and 10mL vials so nothing rattles or breaks. For travel, a TSA-friendly case with snap-lock latches and a small thermometer keeps conditions stable and verifiable.