 how-to
Signs of Peptide Contamination in Vials: A Visual Guide
Table of Contents
- What Peptide Contamination Actually Looks Like
- Cloudy Peptide Vial: When Haze Means Trouble
- Particles in Peptide Vial: Dust, Fibers, and Undissolved Chunks
- Peptide Vial Color Change: Yellow, Brown, or Gel
- Peptide Stability After Repeated Vial Access
- A Step-by-Step Vial Inspection Checklist
- What to Do If You Suspect Contamination
- Conclusion
- Frequently Asked Questions
Last Updated: October 21, 2026
What Peptide Contamination Actually Looks Like
Peptide contamination is any unwanted change in a vial's contents caused by microbes, foreign material, or breakdown of the peptide itself. Spotting it starts with knowing what a healthy vial should look like. This guide from Online Peptide Sales covers the visual signs that matter, the ones that don't, and what to do when something looks off.
Most researchers expect a problem to announce itself. In practice, contamination is often quiet. A faint haze, a few specks, or a color shift can be the first signal. The tricky part is that some of these changes are normal, and some are not.
Below, we'll show you exactly how to tell the difference, using a simple inspection routine that takes under a minute per vial.
Normal Appearance vs. a Problem Vial
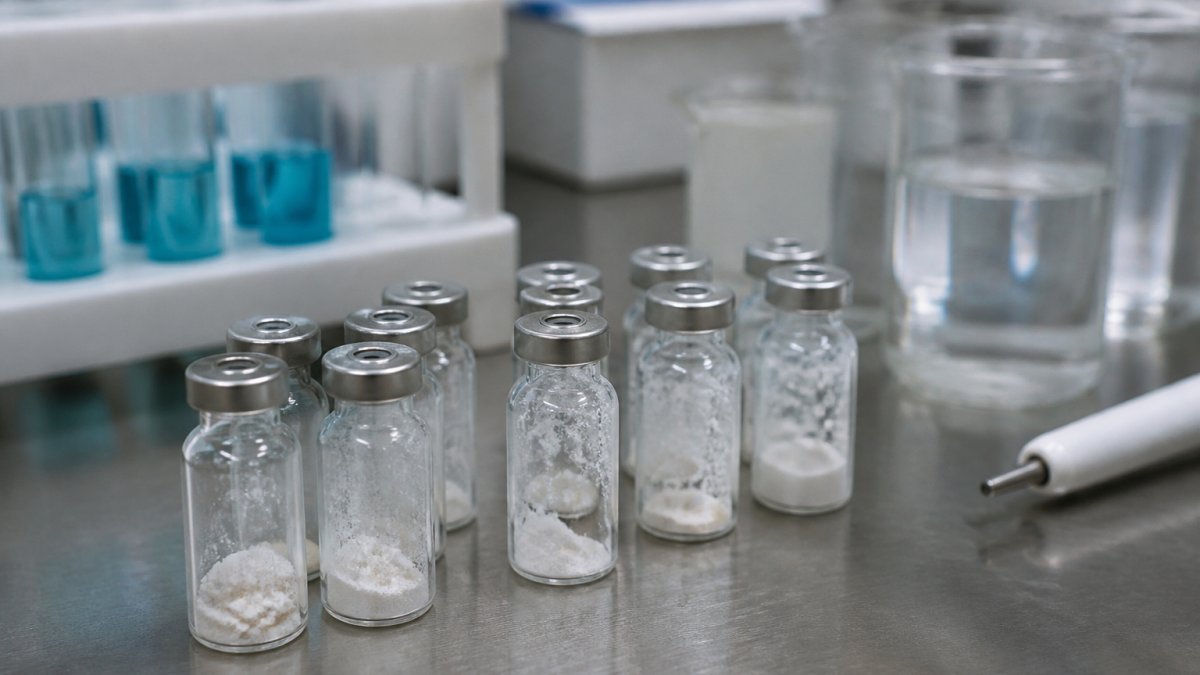
A normal lyophilized peptide vial holds a white to off-white cake or powder. It may sit as a solid plug or a loose puck at the bottom. After reconstitution with bacteriostatic water, the solution should be clear and colorless to pale yellow, depending on the peptide.
A problem vial usually shows one of these:
- Cloudiness or haze that does not clear
- Visible particles, fibers, or chunks
- A color shift toward brown, dark yellow, or gel
- A cake that has melted, collapsed, or turned sticky
One key point most guides miss: a slight tint is not automatically contamination. Many peptides carry a natural pale yellow cast. The concern is a change from that peptide's baseline, not the tint itself.
Cloudy Peptide Vial: When Haze Means Trouble
A cloudy peptide vial is one where the solution looks milky or hazy instead of clear. Haze is one of the clearest visual signals of a problem, but context decides how serious it is.
Freshly reconstituted solution can look faintly cloudy for a few minutes as the powder wets and dissolves. Swirl gently and give it time. If the haze clears, the vial is likely fine.
Haze that persists or worsens points to trouble:
- Precipitation: the peptide has come out of solution, often from improper storage or harsh handling.
- Microbial growth: bacteria or fungi can cloud a solution, especially one mixed with plain water instead of bacteriostatic water.
- Chemical breakdown: degraded peptide can form aggregates that scatter light.
Particles in Peptide Vial: Dust, Fibers, and Undissolved Chunks
Particles in a peptide vial fall into two groups: harmless and not. The harmless group includes tiny air bubbles and undissolved powder that clears with gentle swirling. The not-harmless group includes fibers, dark specks, and chunks that never dissolve.
Here's how to sort them:
- Air bubbles: round, uniform, and rise to the top. They clear on their own.
- Undissolved powder: fine and white, settles at the bottom, and dissolves with time and gentle motion.
- Fibers or lint: thin, irregular strands, often from a wipe or clothing. These signal handling contamination.
- Dark or colored specks: a red flag. They suggest foreign material or microbial clumps.
- Stubborn chunks: solid pieces that survive swirling for several minutes. These point to a poorly formed cake or a peptide that will not fully dissolve.
A peptide that does not dissolve fully is a concern. Some peptides are simply slow to dissolve, but chunks that remain after ten minutes of gentle swirling suggest a quality problem. That is where batch documentation matters. Online Peptide Sales provides Janoshik-verified batch reports for identified samples, so a researcher can check a batch against its reported profile.
Peptide Vial Color Change: Yellow, Brown, or Gel
A peptide vial color change is one of the most reliable warning signs, because color rarely shifts without a cause. But the cause is not always contamination. Color change can come from oxidation, degradation, moisture exposure, or microbial growth, and appearance alone cannot tell you which. The table below separates common appearances from their likely meaning, then the notes below explain the mechanism behind each.
| Appearance | Likely Cause | What It Suggests | Action |
|---|---|---|---|
| Pale yellow tint | Normal for many peptides | Baseline appearance, not a change | Compare to batch baseline |
| Dark yellow or amber | Oxidation or age | Peptide chain damage | Stop and inspect further |
| Brown | Degradation or microbial growth | Breakdown or contamination | Do not use |
| Gel or sticky clump | Moisture exposure or breakdown | Handling or storage failure | Do not use |
| Clear with floating film | Foreign material | Handling contamination | Do not use |
| Pink, green, or unusual hue | Dye, foreign material, or microbial pigment | Foreign or biological source | Do not use |
Yellow is the most misunderstood. A light straw color can be entirely normal for many peptides, and the concern is a change from that peptide's baseline, not the tint itself. A deepening toward amber or brown is different. Brown usually signals oxidation of susceptible residues or breakdown of the peptide chain, and either way the vial is compromised.
Gel formation deserves its own note. A peptide that turns to gel or a sticky clump has usually absorbed moisture or broken down. That is a handling or storage failure, not a cosmetic issue. Moisture can enter through a failed seal, a wet stopper, or repeated access, and once the cake collapses the peptide is no longer in its intended form.
Here is the key point most guides miss: color change is a signal, not a diagnosis. A brown vial could be degraded peptide, a microbial problem, or both. A pale yellow vial could be perfectly normal. Visual inspection can flag a change, but it cannot confirm sterility or measure purity.
If a vial's color has changed and the batch matters to your study, record the appearance, the batch number, and when the change appeared. Online Peptide Sales provides Janoshik-verified batch reports for identified samples, so a researcher can compare a vial against its reported profile before deciding next steps.
Peptide Stability After Repeated Vial Access
Peptide stability after repeated vial access drops with every puncture. Each time a needle enters the stopper, it opens a path for microbes and lets in air. That is why multi-use vials demand discipline.
The seal is the first line of defense. A damaged or coring stopper, where a plug of rubber drops into the vial, is a direct route to contamination. Inspect the stopper before and after each draw.
A missing or changed vacuum is another clue. Many lyophilized vials ship under vacuum, and the stopper resists slightly when first pierced. If a vial that once held vacuum no longer does, the seal may have failed. A lost vacuum does not prove contamination, but it raises the odds and warrants a closer look.
Dropping a vial matters too. Physical shock can crack the cake, loosen the stopper, or introduce micro-cracks in the glass. Any vial that has been dropped should be inspected closely before use.
A Step-by-Step Vial Inspection Checklist
A consistent inspection takes less than a minute and catches most problems early. Run this checklist every time a vial comes out of storage and again before use.

- Check the label and batch number against your records
- Confirm the seal and stopper are intact, with no cracks or coring
- Hold the vial against a white background in good light
- Look for haze, particles, fibers, or film
- Compare color to the peptide's known baseline
- Confirm the cake or powder looks even, not melted or sticky
- Note whether vacuum is present on first puncture
- Swirl gently and confirm the solution clears
Shaking is the wrong move. Vigorous shaking can damage the peptide and create foaming that masks real particles. Swirl gently instead.
What to Do If You Suspect Contamination
Stop using the vial. That is the first and most important step. A suspect vial should be set aside, labeled, and kept away from other samples to avoid cross-contamination. Do not attempt to filter, dilute, or otherwise rescue a suspect vial. Those steps cannot make a contaminated vial safe, and they can spread contamination to other supplies.
Next, document what you saw: the appearance, the batch number, and when the change appeared. This record protects your experiment and helps identify whether the issue is isolated or batch-wide. Photograph the vial against a white background in good light before you set it aside.
Then confront the limits of home inspection. The eye can catch haze, particles, and color shifts, but it cannot confirm sterility or measure purity. A vial that looks clear can still harbor microbes, and a vial that looks hazy may be degraded rather than contaminated. Visual checks are a screening tool, not a verdict.
What lab testing can assess, at a high level:
- Sterility: whether viable microbes are present, using culture-based methods.
- Purity: the proportion of the intended peptide versus related impurities, typically by chromatographic methods.
- Identity and quantity: whether the peptide matches its label and at what amount.
- Particulate matter: the presence and count of sub-visible particles that the eye cannot see.
If a vial matters to a study, proper testing is the only way to confirm what is happening. Treat any doubt as a reason to stop rather than a reason to guess.
Prevention comes down to handling. Use bacteriostatic water where appropriate, keep vials cold and dark, swab stoppers with alcohol and let them dry fully, and avoid unnecessary punctures. Do not reuse needles or syringes, and do not share supplies between vials. A damaged or coring stopper is a direct route to contamination, so inspect the stopper before and after each draw.
Conclusion
Most vial problems show up as a handful of visual cues: haze, particles, color shift, gel, or a lost vacuum. Learning to read them separates a normal vial from a compromised one. A consistent inspection routine and careful handling prevent more contamination than any single fix. When a vial looks wrong, stop, document, and test rather than guess.
Frequently Asked Questions
What are the signs of contamination in a peptide vial?
Look for cloudiness, visible particles, color change, gel formation, or a clump that will not dissolve after gentle swirling. A missing or changed vacuum, a damaged seal, or a cake that looks melted or shrunken are also warning signs. Any one of these means you should stop and inspect further before use. Visual checks cannot confirm sterility, so treat unusual appearance as a reason to pause, not a diagnosis.
Can cloudiness or particles in a peptide vial indicate contamination?
They can, but not always. A cloudy peptide vial may reflect incomplete dissolution, cold storage precipitation, or a degraded product rather than live contamination. Particles in a peptide vial can be undissolved powder, fibers from a filter, or foreign matter introduced during handling. Because the causes differ, note what you see, how the vial was stored, and whether the haze clears with gentle swirling before deciding next steps.
Should a peptide vial be used if its color or appearance has changed?
No. A peptide vial color change, gel formation, or a persistent clump is a reason to stop using that vial. Color shifts toward yellow or brown often point to degradation, and a gel or film can signal aggregation. Set the vial aside, record the batch and Janoshik report details, and contact Online Peptide Sales about the issue rather than guessing at safety.
Can repeatedly accessing a vial increase contamination risk?
Yes. Peptide stability after repeated vial access declines with every puncture, because each entry lets in air and potential contaminants and adds physical stress. Swab the stopper with alcohol, use a fresh needle each time, avoid touching the septum, and keep the vial upright. If a vial has been accessed many times or stored past its practical window, inspect it closely before the next use.